
Help Center
Cloning
This article discusses how to clone information from one year to another to reduce data entry in ImagineTime.
Periodic Cloning
Use the following steps to clone records from one year to another.
- Make a backup (Setup / Utilities | General Utilities | General Utilities | Backup Data File).
- Open Periodic Cloning (Setup / Utilities | Due Date Setup and Utilities | Periodic Cloning tab).
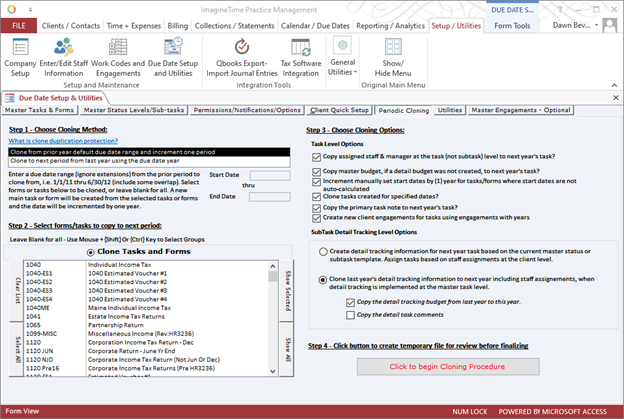
- In the Step 1 – Chose Cloning Method section, select Clone from prior year default date range and increment one period and enter a Start Date and an End Date.
- In the Step 2 – Select forms/tasks to copy to next period section, individually select the desired forms and tasks, or click Select All.
- In the Step 3 – Choose Cloning Options section, clear any check boxes you do not want to be selected and select the desired SubTask Detail Tracking Options.
- In the Step 4 – Click button to create temporary file for review before finalizing section, click the Click to begin Cloning Procedure button.
- On the Review Pending Items window:
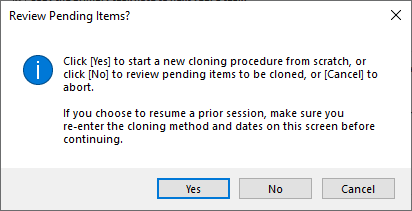
- Click [Yes] to start a new cloning procedure from scratch.
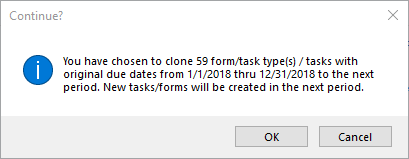
- On the Continue? window, “You have chosen to clone <#> form/tasks with original due dates from <date> thru <date> to the next period. New tasks/forms will be created in the next period.” Click Yes to continue or click Cancel to cancel cloning.
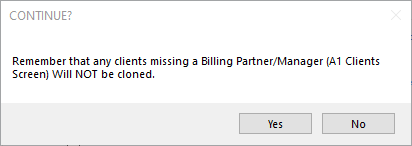
- Clicking OK opens the CONTINUE? window, “Remember that any clients missing a Billing Partner/Manager (A1 Clients Screen) Will NOT be cloned. Click Yes to continue or click No to cancel cloning.
- Clicking Yes opens the Microsoft Access window, “Cloning almost complete! Now review the pending items in the following table and click the button at the bottom of the screen to copy the pending due date items to the permanent due date file. Any overridden due dates will need to be separately entered for the new year.” Click OK to continue.
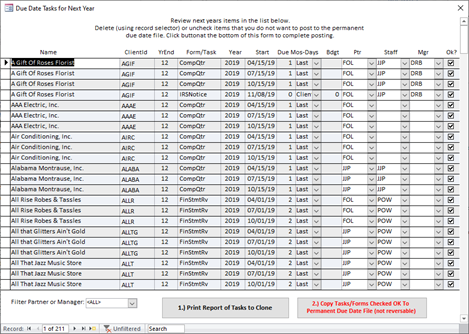
- On the Due Date Tasks for Next Year window, you can review tasks, determine which tasks you want to clone, and Print Report of Tasks to Clone. Any tasks with the OK check box selected will be cloned when clicking the 2.) Copy Tasks/Forms Checked OK To Permanent Due Date File (not reversable) button.
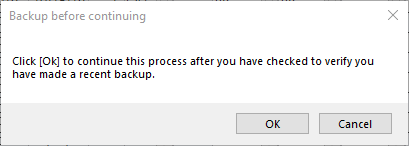
- On the Backup before continuing window, “Click [OK} to continue this process after you have checked to verify you have made a recent backup.” Click OK to continue the cloning process, verifying you have created a backup, or click Cancel to cancel the cloning process and make a backup before continuing.
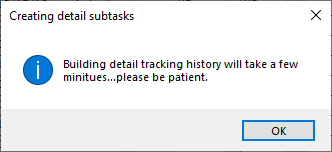
- Click OK on the Creating detail subtasks window, “Building detail tracking history will take a few minutes… please be patient.”
- Click OK on the Cloning Completed window.
…or…
- On the Continue? window, “You have chosen to clone <#> form/tasks with original due dates from <date> thru <date> to the next period. New tasks/forms will be created in the next period.” Click Yes to continue or click Cancel to cancel cloning.
- Click [No] to review pending items to be cloned.
- On the Due Date Tasks for Next Year window, you can review tasks, determine which tasks you want to clone, and Print Report of Tasks to Clone. Any tasks with the OK check box selected will be cloned when clicking the 2.) Copy Tasks/Forms Checked OK To Permanent Due Date File (not reversable) button.
- On the Backup before continuing window, “Click [OK} to continue this process after you have checked to verify you have made a recent backup.” Click OK to continue the cloning process, verifying you have created a backup, or click Cancel to cancel the cloning process and make a backup before continuing.
- Click OK on the Creating detail subtasks window, “Building detail tracking history will take a few minutes… please be patient.”
- Click OK on the Cloning Completed window.
…or…
- On the Due Date Tasks for Next Year window, you can review tasks, determine which tasks you want to clone, and Print Report of Tasks to Clone. Any tasks with the OK check box selected will be cloned when clicking the 2.) Copy Tasks/Forms Checked OK To Permanent Due Date File (not reversable) button.
- Click [Cancel] to not continue with cloning.
- Click [Yes] to start a new cloning procedure from scratch.
- Once cloning is complete, you can optionally run reports for the new year to verify the clone.
Frequently Asked Questions
- How can I mark a task as do not clone?
- There are two options for marking tasks as do not clone. Select the Do Not Clone check box in Manage/Edit Deadlines, or clear the OK check box when running the cloning process.
Manage/Edit Deadlines
- Click Calendar / Due Dates.
- Select the task.
- Select the Do Not Clone check box.
- In the Update related task/form records window, click Yes if you want to conform the [Do Not Clone] status of the related recurring and incomplete <Task ID> tasks setup for this client for the selected task year, or click No to only mark this task as Do Not Clone.
During the Cloning Process
- On the Due Date Tasks for Next Year window, clear the OK check box for each task you do not want to clone.
Learn More
The following knowledge base articles contain additional information relating to cloning in ImagineTime: